2020: The Year of Apple HomeKit
One of my favourite distractions during the lockdown of 2020 has been HomeKit, the home automation software from Apple. Over the last few months I have changed my home setup over to make my lighting fully automated and all under the one app: Apple’s Home app on macOS and iOS.
HomeKt is a software framework which was introduced in 2014 and was originally for developers to start integrating their home devices. As manufacturers of light bulbs, locks and thermostats, to name but a few, started to add HomeKit support, Apple improved its iOS Home app for users to control their home. In recent years I started to dabble with it, but really only when necessary, such as setting up my pair of Apple HomePods which can only be set up with the Home pap.
But at the start of 2020 there were enough new devices to tempt me into using Home app full-time for my home controls. Here is what I discovered and how I set up my house’s lighting system and power sockets.
The Basics:
To use the Home app with HomeKit compatible gadgets, you need a “Home Hub” device. Apple use this Home Hub to connect and communicate between the various gizmos in your house, including the ability to control them remotely. You can turn your lighting or heating on or off when you are away, linking back to the lights through your internet connected Home hub.
An example of a Home hub device is an Apple TV, a HomePod, or an iPad. The Apple TV and HomePod work well as they require very little, other than being plugged in and set up for normal use. The iPad can work as a Home hub but it’s not as convenient; it would need to be left in your home and plugged into power.
With one of these Home Hub devices in place, you can then set up your house in the Home app (Home -> Hubs & Bridges). All you need to do is be signed in with your Apple ID, choose which device is going to be your Home Hub (select one from a list if you have multiple compatible gadgets) and then you are ready to add new accessories.
Accessories:
Up until 2020 I had played with a few home-internet devices. I own a Google Nest thermostat and a Nest Camera, and I have used a few Koogeek WiFi plugs, which works fine as a way to turn on certain lights. But the issue was that none of these talked to each other and all used their own proprietary system (and apps). I have to use the horrible Goole Nest app for the thermostat and camera. For the plugs, the Koogeek app is fine and works well for simply turning plugs on and off, but it isn't integrated with HomeKit and so cannot be used with Siri.
I had three systems: Google Nest (Thermostat and camera), Koogeek (WiFi plugs) and HomeKit (HomePods). But the only one which would work with Siri was HomeKit compatible devices. While everything functioned well, the lack of compatibility and a concern about security meant that it was not the ideal setup. HomeKit is designed to protect the user and, with gadgets such as cameras and locks being automated, it is worth reflecting on which system you trust.
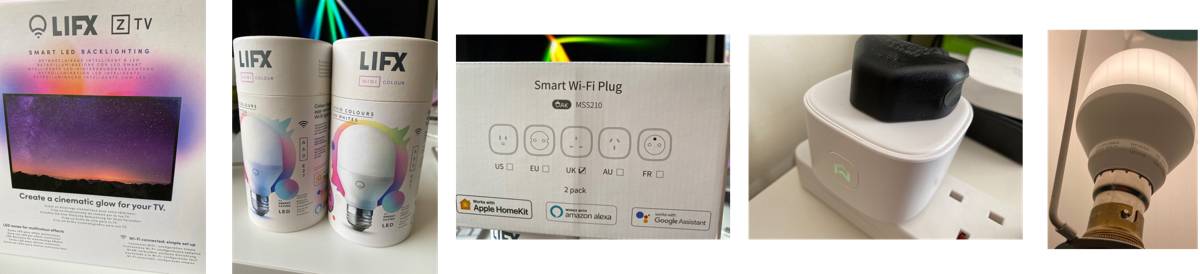
From L-R: Life X Backlighting strip for a TV, two LIFX bulb packs, Meross Smart WiFi Plugs box, a Meross in use with button on top for manual on/off, a LIFX bulb in our lamp
Making the change:
Lighting-
My HomeKit adventure began with light bulbs! I had watched the price of these bulbs and decided to move now as new HomeKit bulbs were available at a reasonable price. The other reason for installing them was because of the range of colours that these LED bulbs could offer.
Having looked around at different manufacturers, such as Philips and Koogeek, I settled on LIFX bulbs having watched some reviews and setup videos. They are a good price, are long-lasting, are cheap to run, and have a great range of features that are compatible with HomeKit and Siri.
I bought three types of lights from LIFX:
- LED strip lighting for behind our TV, above kitchen units and behind our hall bench
- screw-in E27 bulbs and B22 pin bulbs for different lamps around the house
The bulbs are very simple; they’re WiFi connected bulbs which means they are slightly bigger than an old-fashioned bulb, but around the same size as some low-energy bulbs. They are heavier, but this was not an issue in the lamps. The major difference is the cost: each bulb costs around €30-35. It all adds up if you decide to change your whole house, but I took it room by room to test the product and decide if it worked the way I wanted.
WiFi Plugs:
For WiFi plugs, I went for pairs of Meross units, which are simple to use and a reasonable size. They cost about €20-25 for a pair of plugs. The biggest problem with any of these units is the size of the WiFi plugs. Almost all WiFi plugs will have trouble fitting into extension 4-bars along side other plugs. But I had no trouble with them in dual-wall sockets. They look a bit clunky, and so may work best when positioned behind furniture rather than on clear wall sockets. They’re not bad, but they stick out a bit with the devices plugged into them.
I wanted a few of these for other units, such as dehumidifiers and cameras, and they’re perfect for turning on/off any powered device. One caveat- don’t rely on them for your TV or other sleep-mode units. You may be able to power the unit on and off with a WiFi plug, but the TV is likely to remain in sleep mode and not fully power up. The same is true with some radios, dryers, washing machines, etc.
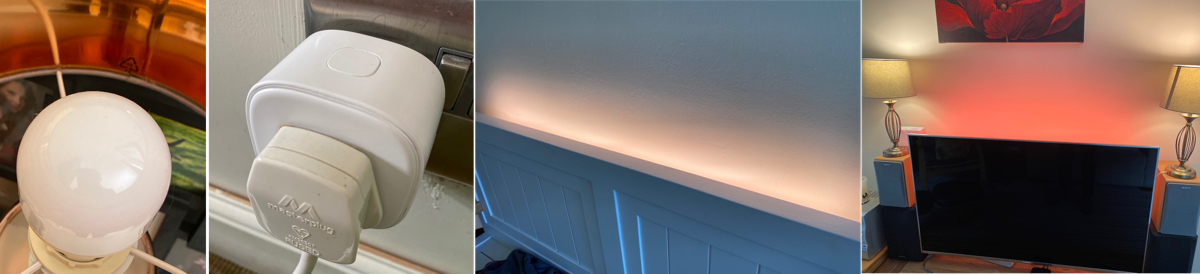
From L-R: LIFX bulb, Meross plug in use, light strip behind hall bench, light strip set to red with white light bulbs around TV
Set-up:
The setup process was very easy, and you can do it two ways-
1/ using the Home app: Apple make this very painless. All HomeKit compatible devices come with a QR label on the packaging. You open the Home app, tap the “+“ button and choose to "add accessory”. On the following page, the camera scans the code to begin to add it to your system. That’s it; the Home app gives the device the WiFi connection to join your home network and you reach a page in the app where you can name and choose options for the device. For example, you can choose to add the device to a room in your home, you can name it so in the future you know which device you are controlling, and there are some device-specific options, such as setting a light-bulb colour.
2/ the other option is to use the manufacturer’s app. I would recommend you set up the device with one, and then you can use both to explore the features. Sometimes the manufacturer’s app has a few extra options and settings. I like the colour settings in the LIFX app more than the options in the Apple Home app. The Home app has a simple colour palette, whereas LifeX has colours plus a range of multicolour “themes” with extra colour effects.
Ideally, set up your devices in one and then explore both apps. Then you are set to control your home devices using whichever app you need or prefer. I normally use the Home app all of the time, but have the other apps for specific tweaks.
Aside from the initial setup, you can also group your devices. For example, we have two lights either side of our TV and one strip light on the back of it, so I grouped these three into one “TV" set. That way when you choose a colour, you only have to set it once for this group of 3 bulbs.
Rooms:
In the Home app, you set up the rooms of your house so each has its own page, and then you assign each new device to a room. It is best to get your room names sorted at the start, so that you can then allocate the devices as you add them. In the Home app you swipe left or right to move through each of the room pages.
Siri:
Voice commands are one of the best parts of the HomeKit system, and these can be used on an iPhone, iPad, HomePod or Apple Watch. I can tell Siri to “turn on the lights in the kitchen” and all lights in that room come on. I can also ask Siri to “turn on the lights” to light up the whole house, or be more specific and ask to “turn on the lights in the kitchen and in the living room but not the bedroom”. Siri will also increase the brightness if you ask to “turn the lights up 30%” etc, or change colour by saying “set the living room lights to yellow”.
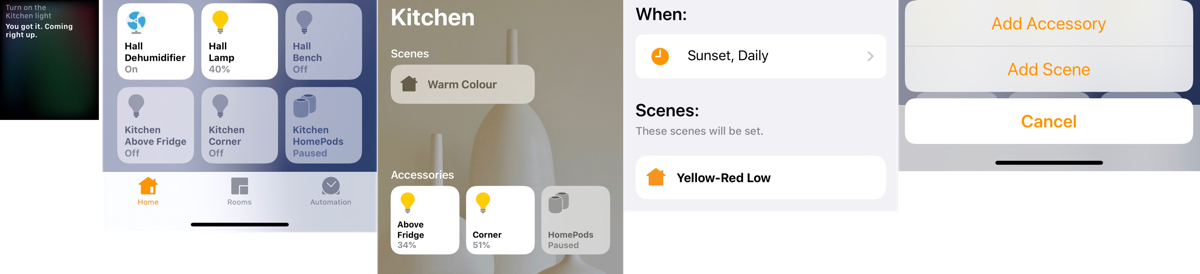
From L-R: Apple Watch Siri common, Home app front page, Kitchen room page, Automation command for Sunset, Adding a new Accessory or Scene
Scenes:
What’s even more effective is setting “scenes”. You can gather various types of devices into a “scene” which could include different settings- for example to set all lights in the living room to 65% brightness and set them to a certain colour. This way you can set up your perfect lighting across rooms, your favourite colours and brightness, and save it as a scene for the future. No-one needs to be constantly setting devices and trying to remember the particular colours and tones, so adding 2-3 scenes for different lighting conditions and times of the day is a great way to set up your home. This can be combined with other devices- so saying “arriving home” to Siri can be used to trigger lights, open locks, start music and turn on gadgets around the home.
Remote Access:
One of the best parts is the control of the system from anywhere in the world, using your internet-connected iPhone and Home app. Looking at the Home app when away, you can see what is turned on and you could turn on a few lights to give the appearance of someone at home. With a HomeKit enabled thermostat you can set your heat to turn on as you depart, so you can return to a warm house. HomeKit can also add sliding gate motors by companies such as Nice so on your return you can ask Siri to “open the gate” as your approach.
Automation:
Apart from Groups and Scenes, Automation is the best way to have your lights and gadgets turn on or off at certain times of the day. Devices can be grouped into an Automation so they are set to come on at a time, or turn off late at night. This can be aligned with sunrise and sunset, or at a specific moment in the day.
Overall:
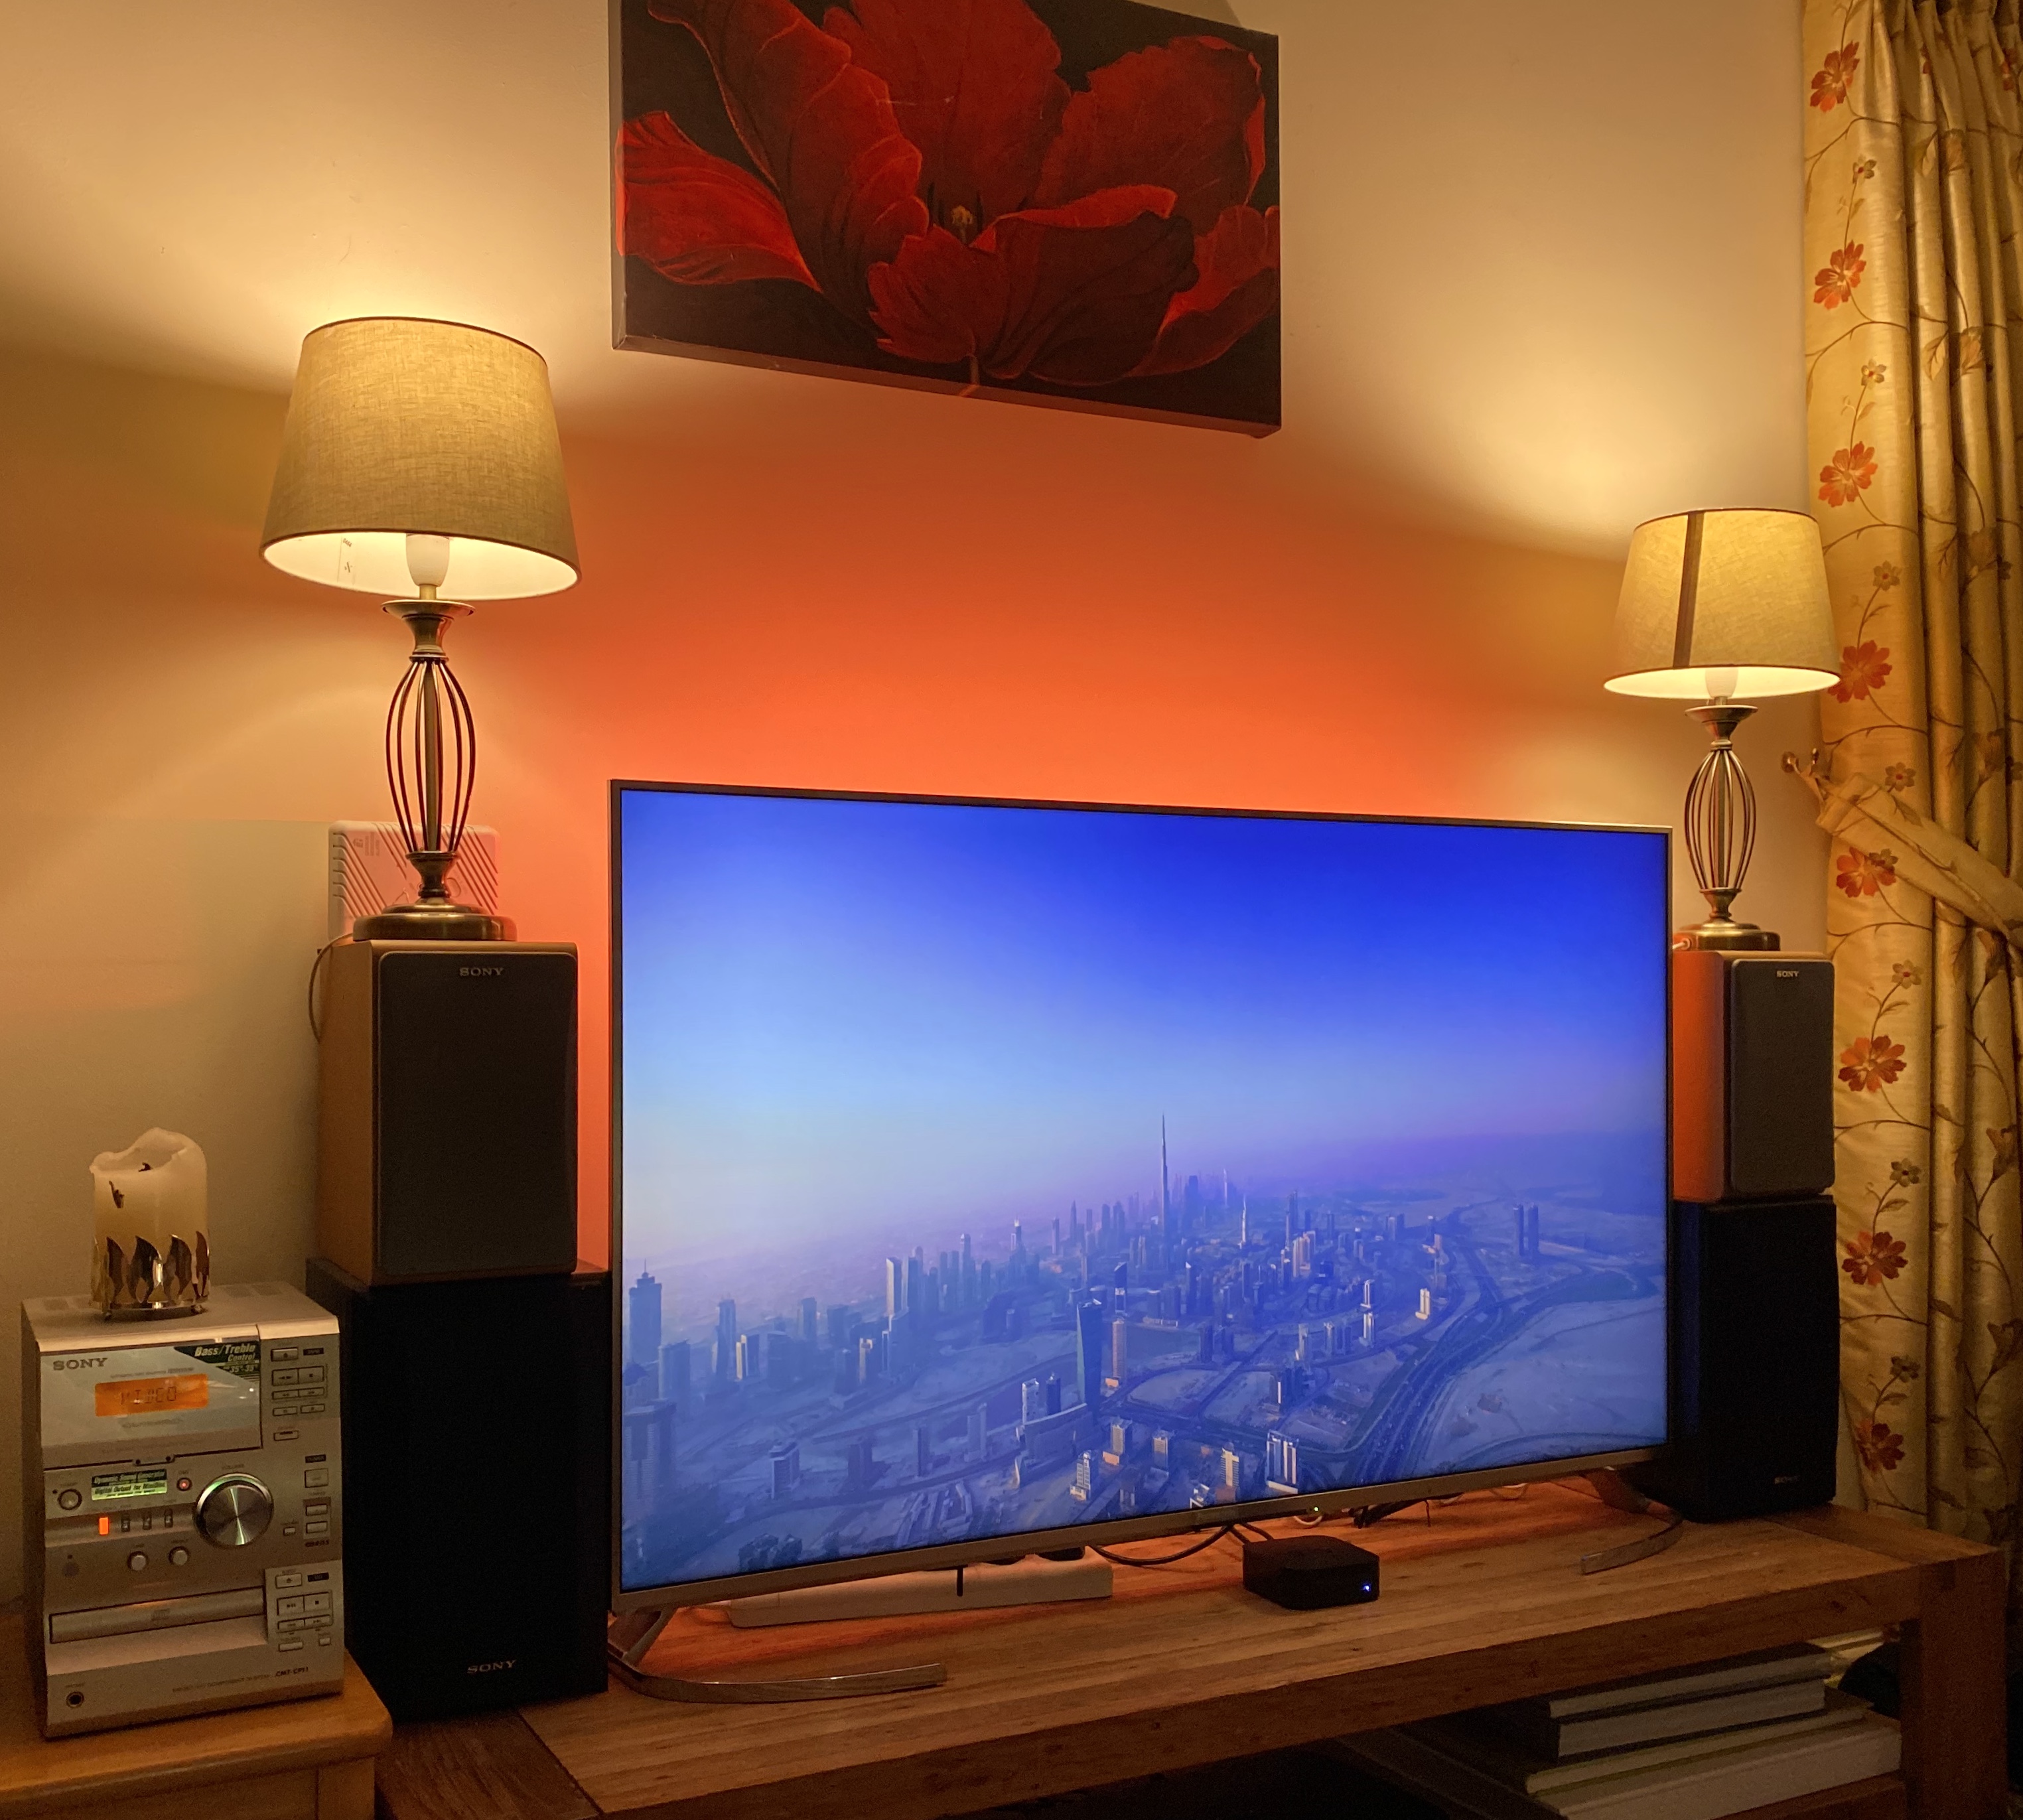
At the end of all of these changes the main difference is the colour in the rooms from the LIFX bulbs, which give the house a warmer feel than the harsh LED white bulbs. The combination of the strip lighting and bulbs gives a good combination light direction, and being able to turn the whole set off in one voice command is excellent. My favourite part- turning all of the lights on or off simply using my Apple Watch. I hold in the digital crown in and ask Siri to “turn on the lights” and that’s it- the entire house lights up.
My intention is to get our sliding gate motor integrated this month, so will update this article to let you know how that goes…
For more detail from Apple on the Home app and HomeKit compatible devices, check out their Home page: https://www.apple.com/ios/home/
For Life X bulbs and lighting strips: https://eu.lifx.com
For Meross WiFi plugs: https://www.meross.com
Guide: Working From Home
Given the recent developments around coronavirus (Covid-19), now seems like a good time to look at how to work from home and steps you could take to get yourself ready for remote working:
Step 1: Internet
The first problem for any home-worker is access to good broadband speeds. Being able to access emails, download attachments and visit websites will be affected by the speed of your home internet. So to check your speeds, use the speedtest.net website when you are at your house and on your home WiFi. This will give you a rough outline of the speeds. Try to run the test 3 or 4 times to get an average picture of the download and upload speeds.
- Download speeds relate to how fast webpages appear and how quickly you will receive your emails and their attachments
- Upload speeds will show how fast you can send out emails
If you are lucky enough to be connected to a fibre broadband service, your speeds will be over 100mbps, and will be more than enough to work from home with. If you have standard broadband, you are likely to get speeds in the mid double digits, such as 40-60mbps. This will also work fine for most internet services, such as emails, web pages and online audio/video (FaceTime, Skype, WhatsApp).
The main concern is if you are below 20mbps, and especially if you are in the single digits. This will not be enough for a reliable connection. You may scape by for lighter work such as sending small emails and light web use, but forget reliable audio and video links
If you have a poor landline broadband connection, all is not lost. Your mobile phone may be able to help! Check the speeds using the free Okla Speedtest app and check this at home, without being connected to your home WiFi. If your mobile signal gives you a decent data speed, then this could be used as a link for your laptop or iPad. But you need to be careful here about one major drawback- data allowances. Check with your mobile phone provider about your data limits. It is possible that you are on a limited data plan and if you go above that allocation you will be charged per MB. This can get very expensive and so it is important to check this in advance. In Ireland, 3 tend to have unlimited data allowances, whereas Vodafone and others limit use to a certain number of GBs.
If you have checked your limits and are happy to use the service, then here is how to use your phone as a Personal Hotspot:
- on your iPhone, turn on Personal Hotspot (Settings -> Personal Hotspot). Note the password here as this will be required below.
- on your Mac or iPad, join the new iPhone WiFi network being given out by your device and join the network by using the special password (as noted above)
- now your iPhone will have a Personal Hotspot icon at the top of its screen, showing that it is being used
To save data, try to turn on personal hotspot when you need it and turn it off afterwards. For example, set up a number of emails in your outbox and then turn on hotspot to send them out in one go.
Step 2: Email
Many people do not have a good record of their email settings. Try to gather the information you need such as:
- what is your email account's username and password
- what type of email service are you using: POP? IMAP? Exchange?
- can you use a website to sign into your email account to view and reply to your messages? (called webmail)
- if you have an IMAP account, do you know the incoming and outgoing mail server settings and port numbers- it's good to have a record or screen shot of these
- the worst type of email account is POP, as this does not sync easily between multiple devices. If you do intend to work from home, try to see if you can change your account from POP to IMAP or Exchange in advance (check with your email provider about this before you adjust any settings)
Is you email set up on your phone? You can add the account to your phone and then you can turn it off so it is silent, but available with one tap. You don't have to have it on all the time if you dislike being interrupted in the evening and at weekends, but it can be useful to have the facility should you need to access them remotely.
Step 3: Screen Sharing
If you have an office PC and you need to access this from your home iMac, laptop or iPad, you can use one of the screen sharing services such as TeamViewer or Splashtop. With permission from your employer (!) and with the right software, you will be able to access your work Mac/PC and view the screen as if you were at the desk.
- TeamViewer: this is a handy app for occasional screen sharing. You need to have TeamViewer open and running on your work computer to be able to then access it from your home on your Mac or iPad. Under Mojave and Catalina, you also need to give TeamViewer access to Accessibility settings on your work device, otherwise you may not be able to move the pointer on the work computer. Check out this document from the TeamViewer support site. The main drawback on TeamViewer is the cost- if you use it regularly, you will be asked to pay a fee, and the app will stop working unless you do this. It's great for occasional logins, but expect to pay for professional and commercial use
- Splashtop-: our favourite app for professional use is Splashtop. This costs about $60 per year for 2 computers, and $99 per year for up to 10 computers. If you are going to be using screen sharing a lot over the next few months, this is the app to go for. It needs two parts: 1/ the Splashtop app on your home Mac/PC/iPad, 2/ the Splashtop Streamer app on the Mac/PC you wish to access
Step 4: Cloud Services
If you are going to be working from home, it can make sense to place your work files and folders in a cloud service, so that those can be accessed from any of your devices. Assuming that this does not cause problems for your employer's data policies and security rules, you could move your desktop files into a service such as iCloud Drive, Dropbox, Google Drive or Microsoft OneDrive. A few pointers:
- don't load everything in there- be organised and try to create a clean set of folders and files so you know where things are
- files should only remain in cloud services for as long as you need them to be in there. Don't dump your entire life in Dropbox- try to spring clean and think through what you need. With the screen sharing apps (above) you could add more at a later date
- you will pay for large amounts of data- for example iCloud and Dropbox give a small allocation for free and then you will need to upgrade to a paid account. Even more of a reason to be well organised
- you must have a good broadband speed to use cloud services
- you should look at the smart sync features in cloud service, so all of the files don't have to come down from the cloud to your laptop or home device; instead you bring them in as you need them.
Step 5: Accessories
A few extra tips:
- try not to work on your laptop on the desk, where you curl your shoulders in over a laptop. For better posture, place the laptop on a few books so it is up at eye-level and use an external mouse/trackpad and keyboard
- use a set of headphones for calls. With Bluetooth headphones, this is a great way to free you up to move around as you talk, or to take notes on your keyboard at the same time
- don't forget your backups! You can pick up a small USB drive for home backups for less than €70
- Apple's iWork office suite (Pages, Keynote and Numbers) is free to all Apple users through the App Store. You can also download a copy of Microsoft Office for personal use for €69 per year (from microsoft.com)
- FaceTime might scare people who hate using video, so why not use the FaceTime Audio feature for calls-only. They are free to other users and every Apple user in your Contacts app will have a small video and audio icon beside the word "FaceTime". Tap the audio button to make an audio-only call the other user for free. This has much better sound quality than mobile phone calls!
I hope some of these suggestions help to keep people working, even if they do need to spend a bit of extra time at home over the next few months.